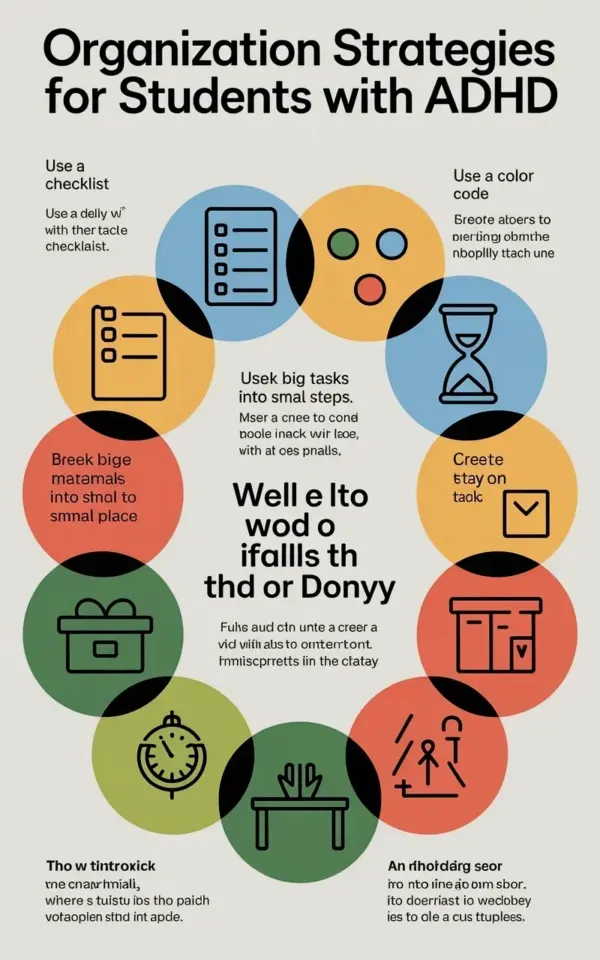
So you are staring at that circular infographic with the colorful bubbles, right? The one titled “Organization Strategies for Students with ADHD.” It starts with a daily checklist and spirals through 10 simple tips, each in its own blue, orange, green or yellow circle, complete with little illustrations that actually make sense. That visual is exactly what you need if you are trying to build a student planner without spending a ton of money. And honestly, as someone who has tried every free printable under the sun, I can promise you: budget friendly doesn’t mean second best. Here is the thing. These ADHD organization strategies for students work because they lean into how your brain actually ticks, not how everyone else thinks you should be organized. No expensive planners required. Just a few smart tweaks and a willingness to start small.
Why a Daily Checklist Actually Works (Especially on a Budget)
Look at that first bubble in the infographic. It has a blue outline and a simple checklist drawing. That is not an accident. The whole point of a daily checklist is to offload the mental load of remembering. Your brain already has a million tabs open. Do not make it hold onto “finish history paper” too. Write it down.
But here is the catch most people miss: a checklist meant for an ADHD brain can’t be a monster to do list. If you dump 20 tasks on it, you will either ignore it or feel like a failure by 10 AM. Instead, try a micro checklist. Three to five items max. Use a scrap piece of paper or a free app like Microsoft To Do. Not gonna lie, I once tried to organize my desk with a system involving 47 sticky notes and it was a disaster. Stick to one daily list, written on a cheap notebook, no fancy stickers required.
- Pick 3 or 4 tasks you can realistically finish today. One of them can be “eat lunch.” Seriously.
- Check them off as you go. The physical act of marking done is a tiny dopamine win.
- If you don’t finish everything, move it to tomorrow. No guilt allowed.
The 10 Tip Flow: One Strategy at a Time
The infographic arranges its tips in a clockwise circle, like a roadmap. You start with the checklist, then move through nine more. Each bubble has a different color and illustration, which makes it way easier to remember than a boring list of text. For example, one bubble might show a clock and suggest “Set timers for tasks.” Another might show a backpack and say “Pack your bag the night before.” Simple stuff. But simple stuff works when you actually do it.
Honestly, the real magic here is that you don’t need to tackle all ten at once. Pick two or three that feel the most urgent. Maybe that is the daily checklist (bubble one) and the timer tip (bubble three). Try them for a week. Adjust. Then add another. The circular flow is just a suggestion, not a rigid path. Break the symmetry if you need to. Your ADHD brain thrives on flexibility, not perfection.
One weird thing I noticed: the illustrations are deliberately basic. A stick figure, a simple clock, a drawn backpack. That is actually a pro level move. Complex images can overwhelm, but quick visual cues stick. And you can replicate that yourself. Draw a tiny star next to a task you are dreading. Use a green highlighter for priority items. No artistic skill needed.
Setting Up Your Student Planner Without Spending a Dime
Ok so the infographic is basically a ready made visual planner, but you might want something you can actually write in. That is fair. But you absolutely do not need to drop $40 on a fancy academic planner. Here is what I do. I grab a cheap spiral notebook from the dollar store. Then I create my own weekly spread using a ruler and a pen. Two columns for weekdays, a section for notes, and a box for the daily checklist. It takes ten minutes and costs maybe two bucks.
If you prefer digital, Google Keep is free and lets you color code notes. Or use Canva’s free templates to design a custom weekly page and print it out. The key is to keep the layout predictable. Same column widths. Same spot for your checklist. Predictability reduces mental friction. And that is the whole goal: make organizing feel less like a chore and more like a habit you barely think about.
Color Coding and Illustrations: Not Just for Cute Stuff
That infographic uses blue, orange, green and yellow for a reason. Color helps your brain categorize information without reading a single word. You see orange, you think “this is a task for morning.” Green means “afternoon.” Or maybe blue is for school and green is for personal. Assign a color to each class or type of task and stick to it.
You can implement this for free. Highlighters cost a dollar. Colored pens are cheap. Or use the built in color tags in your phone’s calendar. The illustrations in the infographic serve the same purpose. A picture of a backpack tells your brain “packing” faster than text can. So when you set up your own planner, add simple doodles. A tiny book icon next to reading assignments. A cup of coffee next to morning tasks. The sillier the better. I draw a little ghost next to things I really do not want to do. It makes me smile and then I actually do them.
Realistic Checklists That Don’t Feel Like a Punishment
The biggest trap with organization is turning it into a rigid system that makes you miserable. If your daily checklist includes “clean entire room, finish all homework, meal prep, and exercise for an hour,” you will quit by Tuesday. That is not a flaw in your character. That is a broken system. The infographic understands this. The checklist bubble is the starting point, but notice it doesn’t say “complete everything.” It says “use a daily checklist.” Small distinction, huge difference.
Build your list with anchor tasks, the non negotiable stuff that keeps your day from derailing. For me, anchor tasks are: take medication, drink a glass of water, and do one school assignment before noon. That is it. If I hit those, the rest of the day is gravy. And I put the checkbox right next to the task, just like the infographic. Honestly, sometimes I draw a smiley face when I check it off. Childish? Maybe. Effective? Absolutely.
How to Keep Your Study Space from Becoming a Disaster Zone
The infographic probably includes a bubble about organizing your study area, maybe with a drawing of a desk or a binder. Let’s be real. A study space can go from tidy to war zone in about twelve minutes when you have ADHD. But the solution is not to Marie Kondo everything into labeled bins. That is aspirational but not realistic on a student budget or timeline.
Try the one bin rule. Get a single plastic bin or cardboard box. Throw everything that is out of place into it. Not organized, just collected. Then, when you need something, pull it out. Once the bin gets full, take ten minutes to sort it. That keeps the surface of your desk clear without requiring a full overhaul. Cost: zero dollars if you reuse a shoebox. And if you want to reference the infographic, print it out and tape it to the wall above your desk. That visual reminder can kickstart your brain when you start to drift.
One more thing. Do not underestimate the power of a vertical surface. Pin the infographic to a corkboard or even tape it to your laptop lid. That circular layout is designed to be glanced at, not studied. Your eyes catch a color, you remember the tip, you move on. That is the kind of low effort organization that actually sticks.
So try one tip from that infographic today. Maybe just the daily checklist. Or maybe the timer trick. Start small, see what clicks, and give yourself permission to adapt. Because the point isn’t to become super organized overnight. It’s to find a handful of strategies that make your student life a little less chaotic. And you already have the roadmap. Color coded and everything.
#adhdorganization #studentplanner #dailychecklist #studytips #adhdstrategies
Leave a Comment